
Setting Up Your RV for Easier Entry, Exit, and Movement Inside
Learn how grab bars, step stools, nonslip mats, and layout tweaks can reduce fall risk and improve daily comfort inside your RV.
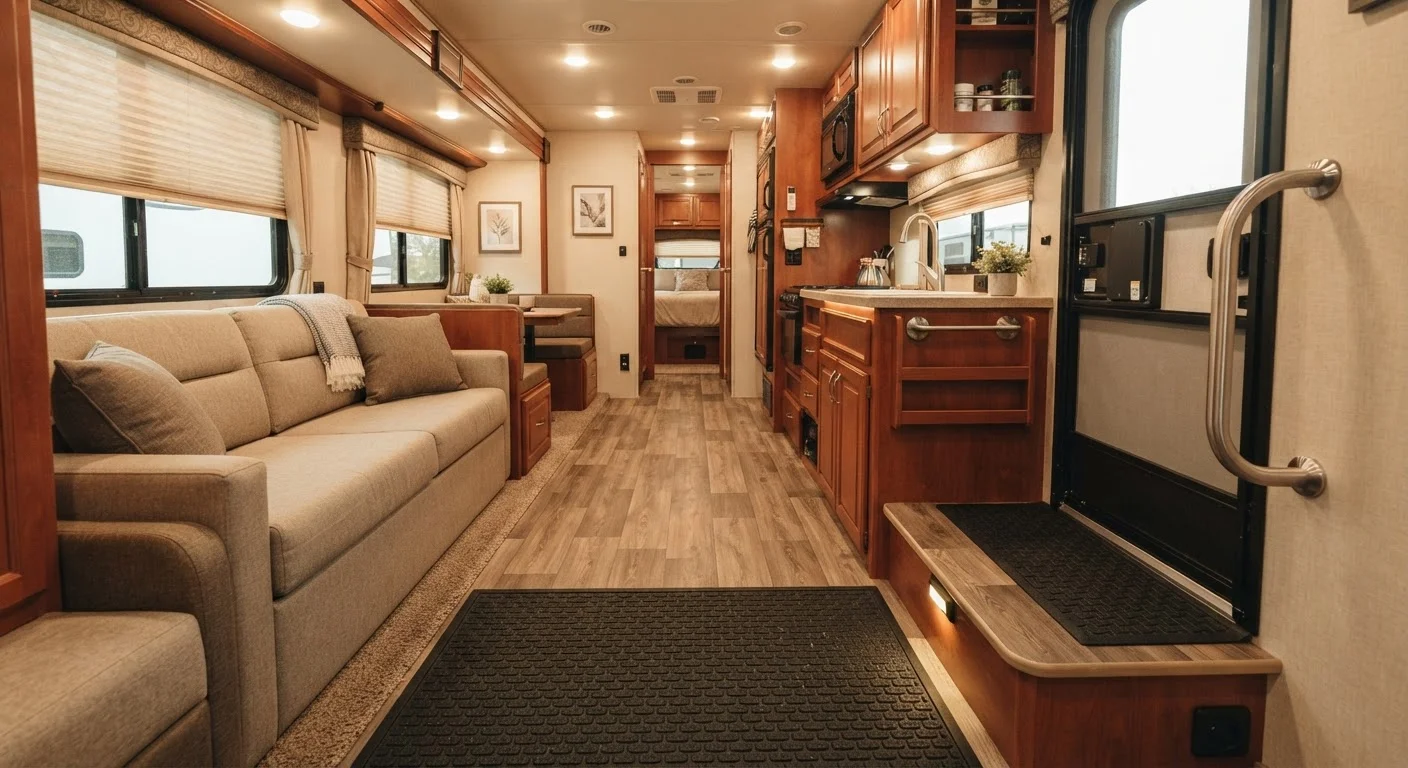
Photo: MyUrbanEscapes.net | Small Escapes. Big Experiences. editorial
—— In This Article
Key Takeaways
- Grab bars at the entry door and bathroom are among the highest-impact safety upgrades for older RVers.
- Nonslip mats, better lighting, and decluttered walkways cost little but significantly reduce fall risk.
- Step stools and portable handrails can make entry and exit safer without permanent modifications.
- Rearranging storage so frequently used items are at waist level reduces awkward bending and reaching.
- Many accessibility improvements transfer well whether you travel by RV or rental property.
Why RV Interiors Require Special Attention for Older Travelers
RVs are engineered for space efficiency, not accessibility. The typical interior combines steep entry steps, compact bathrooms, narrow corridors, and overhead storage — all within a structure that may be slightly tilted depending on campsite leveling. For travelers over 60, these features interact with normal age-related changes in balance, joint flexibility, and reaction time in ways that increase fall risk considerably.
This is not a reason to avoid RV travel. It is a reason to adapt your rig before problems arise. As our guide on RV travel after 60 explains, most physical challenges of later-life RVing are manageable with the right preparation. The modifications in this guide are practical, relatively low-cost, and can be completed in a single weekend before your next trip.
Falls Are the Leading Risk Inside RVs
The compact, multi-level layout of most RVs creates genuine fall hazards — especially when the vehicle is parked on uneven ground. Wet bathroom floors, narrow doorways, and steep entry steps are consistently cited by older travelers as the most dangerous moments of their trip. Address these areas before your first night out, not after an incident.
Many of the same principles that improve RV safety apply when evaluating other accommodation types. Our article on accessibility features in vacation rentals covers what to look for when your travels include overnight stays away from your RV.
What You'll Need Before You Start
Before making any modifications, gather a clear picture of your specific needs and your RV's construction. The tools and materials below cover the most common upgrades — you may not need every item depending on your rig's existing features and your personal mobility considerations.
What you will need
Grab bars (straight and angled)
Provide stable grip points at the entry door, bathroom, and sleeping area transitions.
Nonslip adhesive mat strips
Applied to entry steps and bathroom floor to prevent slipping on wet or smooth surfaces.
Portable step stool with handle
Reduces the step height at the entry door for easier entry and exit.
Bed rail or transfer handle
Gives leverage when getting in and out of the sleeping area.
Battery-powered LED tap lights
Illuminate dark corridors and the bathroom during nighttime movement.
Stud finder
Locates structural backing in RV walls to ensure grab bars are anchored safely.
If drilling into walls is beyond your comfort level, a qualified RV service technician can handle installation in a few hours. This is a worthwhile investment given the safety stakes.
Verify Weight Limits Before Installing Hardware
Grab bars and handrails must be anchored into wall studs or solid structural backing to be safe. A bar screwed into thin paneling alone can pull free under body weight. If you are unsure of your RV's wall construction, consult a qualified RV technician or dealer service center before drilling. An improperly installed bar provides false security and can cause a fall.
Step-by-Step: Modifying Your RV for Safer Daily Use
Assess Your Entry Steps
Stand outside your RV and honestly evaluate the entry. Most Class A, B, and C motorhomes have two to three steps with a significant height rise. Note whether the existing handhold — if any — is within comfortable reach and provides a firm grip during both ascent and descent.
Look for a mounting surface near the door frame where a vertical or angled grab bar could be anchored. If your RV lacks a permanent entry grab bar, this is the single most impactful modification you can make.
Install a Grab Bar at the Entry Door
Using a stud finder, locate the structural framing beside or just inside the entry door. Mark anchor points that align with studs or solid backing. Mount a stainless-steel or ABS grab bar at a height that allows you to grip it firmly while your foot is still on the top step — typically 36 to 42 inches from the floor, though your own reach should guide placement.
Use lag screws of the appropriate length for your wall assembly. After installation, apply firm downward and outward pressure to confirm the bar does not flex or shift.
Apply Nonslip Surfaces to Steps and the Bathroom Floor
Peel-and-stick nonslip treads applied across the full width of each entry step dramatically reduce slip risk, particularly after rain or morning dew. Choose treads rated for outdoor use with a textured surface visible underfoot.
Inside the bathroom, place a rubber-backed bath mat on the floor and add adhesive nonslip strips inside the shower or wet bath enclosure. Replace these periodically — adhesion weakens over time, and a bunched or curling mat creates its own trip hazard.
Add Grab Support in the Bathroom
The RV bathroom presents multiple contact points where stability support helps: beside the toilet, inside the shower or wet bath, and near the sink if you need to lean forward. Install a fixed grab bar beside the toilet at a height that allows you to push up from a seated position — typically level with or just above the seat height.
For the shower, a wall-mounted bar oriented at a slight diagonal offers both vertical (for balance while standing) and horizontal (for lowering and rising) grip. If permanent installation is not feasible, tension-mounted or suction-cup grab bars rated for body-weight load are a temporary alternative — but confirm the manufacturer's weight rating before relying on them.
Improve Lighting Along Nighttime Paths
Identify the path you most commonly walk after dark: from the sleeping area to the bathroom. Install battery-powered LED tap lights or plug-in motion-sensor nightlights at floor level along this route. Position one inside the bathroom doorway and one near the entry to the sleeping area.
Adequate lighting is particularly important in RVs because the floor plan often involves level changes, narrow passages, and furniture corners that are easy to misjudge at night.
Reorganize Storage for Daily Convenience
Open every cabinet and assess where your most-used items currently live. Anything you reach for daily — medications, glasses, kitchen basics, toiletries — should be stored between hip and shoulder height to eliminate the need to bend low or stretch overhead while the RV is parked on potentially uneven ground.
Move heavy items to lower cabinets where they can be lifted without overhead strain, and use lightweight containers to consolidate small items so you handle fewer objects per retrieval. Clear clutter from the main walkway entirely; even a single bag on the floor creates a meaningful trip hazard in a narrow RV corridor.
Address the Sleeping Area
Getting in and out of an RV bed — often elevated or positioned against a wall — is a common difficulty. A bed rail that slides between the mattress and bed base provides a stable push-up point without requiring wall installation. Alternatively, a transfer handle that hooks under the mattress can serve the same purpose portably.
If the bed height is too high for comfortable entry, a low step stool with a nonslip surface placed bedside can reduce the distance. Ensure the stool sits flat and does not wobble on the RV floor.
Test Everything Before You Leave Home
After installing any safety modification, run through your full daily routine — entering, using the bathroom, opening overhead bins — before your first trip. Problems are much easier to fix in your driveway than at a remote campsite. Ask a travel companion to observe your movement and flag anything that still feels unstable.
Once these modifications are in place, pair them with a consistent pre-departure routine. Our senior RV safety checklist walks through what to verify each time you break camp, including confirming that mats are secured and loose items are stowed before the vehicle moves.
Thinking Beyond the Rig
Interior modifications address daily life inside the RV, but some travelers also benefit from driving adaptations. If reduced mobility affects your time behind the wheel, our guide to driving an RV with reduced mobility outlines seating adjustments and route strategies worth exploring.
For travel that extends beyond your RV — whether side trips, hotel stays, or visiting family — portable accessibility aids such as travel-size grab bars and nonslip mats can extend the same safety principles to unfamiliar spaces. Planning your overall trip with accessibility in mind from the start makes every leg of the journey more comfortable. See our RV trip planning hub for a broader framework that senior travelers can adapt to their needs.
This article is for general informational purposes only. Consult a qualified professional before undertaking any structural modifications to your RV, and speak with a healthcare provider about your individual mobility and safety needs before traveling.

Rv Travel Editorial Team
RV Travel Editorial Team is the collective byline for our editorial team and contributor network. Articles published under this byline or an editorial pen name are researched, written, and reviewed according to our editorial standards for clarity, consistency, and independence before publication.
View author profile